
Your photo library has 12,000 images and maybe 300 of them have keywords. Typing the other 11,700 at the roughly 150 photos an hour a skilled keyworder manages is about 78 hours, two full working weeks, which is why the job never gets finished.
What automatic photo keywords are
An automatic photo keyword is a descriptive word or phrase, such as "golden retriever", "sparkler exit", or "linen blazer", written by software that read the image's pixels. A vision model identifies what is in the frame and emits a keyword list, the same job a human keyworder does, without anyone typing. For the full time-and-cost math against a human, see AI photo tagging vs. manual keywording.
Three things are not automatic keywording, because tool marketing loves to blur the line:
- Filename and folder matching. Search that only reads
IMG_4827.JPGand the folder name has not keyworded anything. - EXIF data. Camera model, capture date, GPS. Useful, but it says nothing about what the photo shows.
- Shallow category detection. "Person", "food", "outdoor" stamped on every image. Technically keywords, practically useless once a library passes about 1,000 photos.
Photographers call this keywording and newer tools call it tagging. Same job, different home for the output, and that home is the first real decision.
Decide where the keywords should live first
Decide where the keywords need to end up before you compare tools, because there are two homes and most tools write to only one of them.
- Embedded in the file. Desktop keyworders write keywords into the image's IPTC or XMP metadata fields, the photo metadata standard the IPTC maintains. Embedded keywords travel with the file, so Lightroom, Bridge, and stock agency uploaders all read them.
- In a searchable index. Catalog tools store keywords in a database that points at the file instead of writing into it. Originals stay untouched, and the whole team searches one index from a browser.
Our plain-English guide to EXIF, IPTC, and XMP covers which fields survive export and upload.
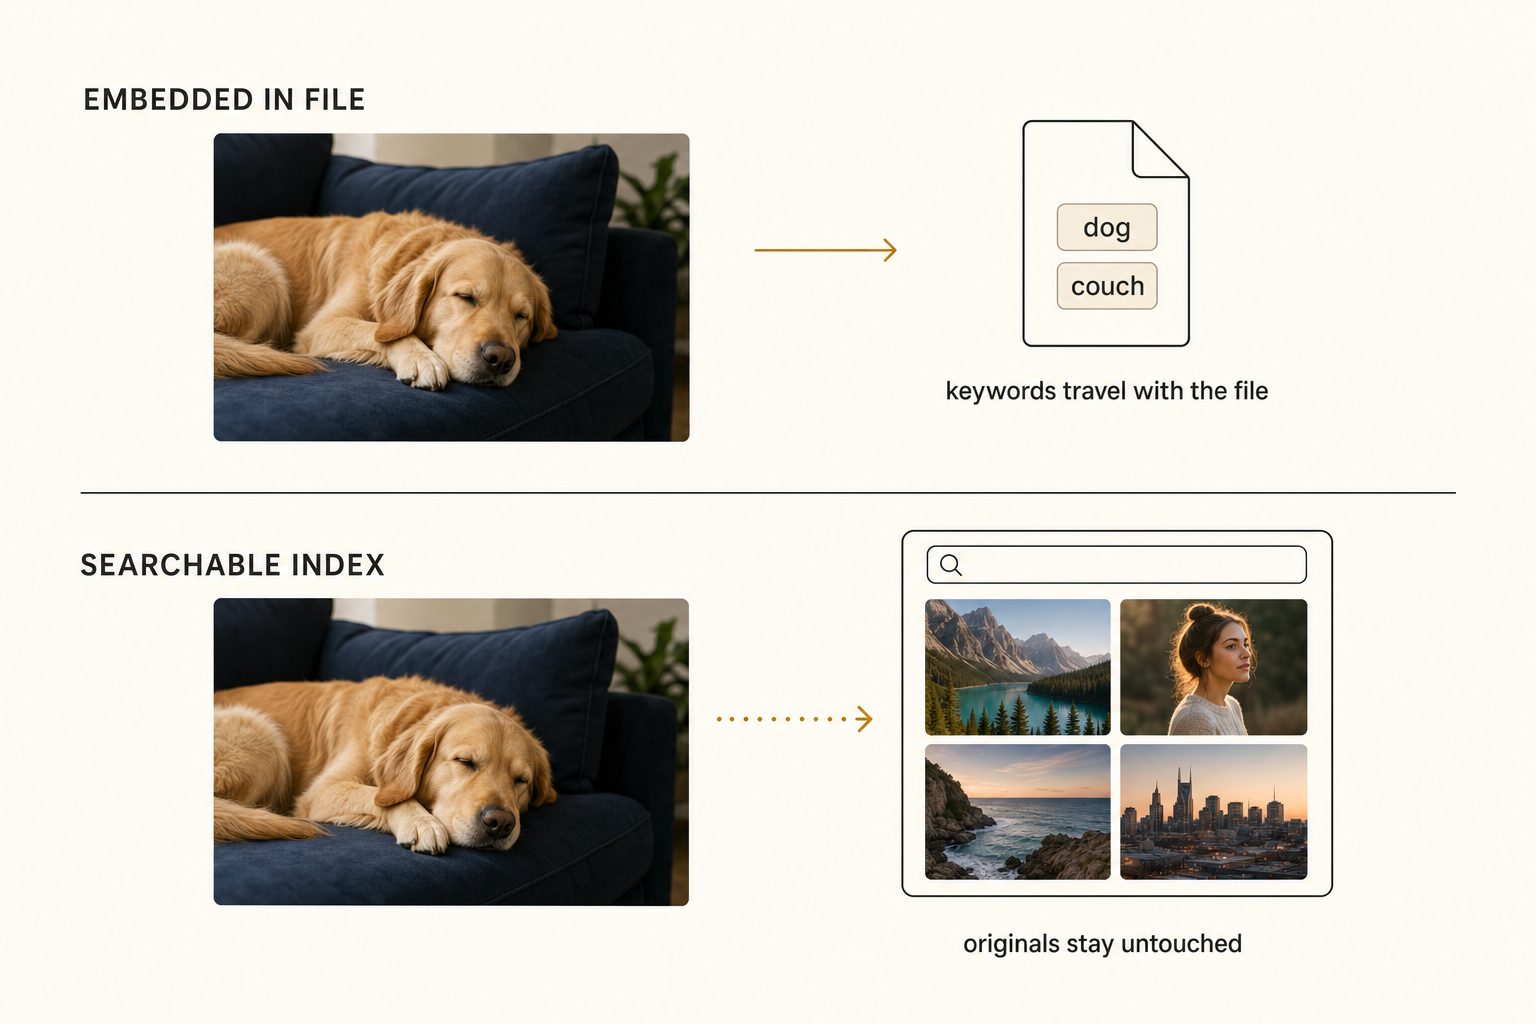
| Embedded (IPTC/XMP) | Indexed (catalog) | |
|---|---|---|
| Travels with the file | Yes | No, keywords stay in the index |
| Originals modified | Yes, metadata fields | Never |
| Team can search | Only with shared software | Yes, from a browser |
| Stock submission ready | Yes, uploaders read the fields | Not directly, uploaders read embedded fields |
| Works without downloading | No | Yes, reads Drive or Dropbox in place |
Choose embedded for stock submission or solo Lightroom work, and an index for a team searching a shared Drive or Dropbox library. Studios that need both run a catalog for everyday search and a desktop keyworder for the set headed to an agency.
Three ways to generate automatic photo keywords
Automatic photo keywords come from three kinds of tools, and the right one follows from where the keywords need to live.
Free and DIY
Free options cover a one-off job under about 1,000 photos, as long as generic categories are good enough.
- Google Photos. Strong content search for personal photos, but the labels stay inside the app, where you can search them but never see, edit, or export them as keywords. It is also tied to a personal account.
- Google Drive. Drive search matches filenames, text printed inside images, and a few broad categories, so it finds "beach" but not "sand linen blazer, on-model". Our breakdown of why Google Drive search misses most photos shows the gap.
- digiKam. A free, open-source desktop organizer with basic auto-tagging, at the cost of more setup.
- Your own script. If you write code, you can send images to a vision API like Claude's and store the results yourself. That is exactly the work the paid catalogs automate.
Past that you hit the 1,000-photo wall, where a library is too big to navigate by memory. Our complete guide to AI photo tagging in bulk explains why shallow categories stop helping there.
Desktop keyworders and Lightroom plugins
Desktop keyworders are the right call for a solo photographer whose library already lives in Lightroom and needs keywords inside the files. ON1 Photo Keyword AI and Excire Foto are buy-once apps that read photos on your own machine (pricing varies by version, check their current pages). ON1 embeds its keywords as XMP, and Excire's Lightroom plugin can write keywords back to your files.
Both are local-first, and that sets their team limit. ON1 keeps no shared catalog, and Excire's Office Edition keeps one database on a network drive that colleagues take turns opening, rather than searching photos in place on Drive or Dropbox. Our Tagrly vs. ON1 Photo Keyword AI and Tagrly vs. Excire Foto comparisons go deeper.
Connected catalogs
Connected catalogs fit when the photos live in Google Drive or Dropbox and more than one person needs to find them. They read photos through a read-only connection, run every image through a vision model, and store the keywords in one searchable index the whole team shares. Tagrly is one example in this tier; it uses Google's drive.readonly scope and never gets write access to your files.
In Tagrly's own testing on a 5,000-photo set, focal-subject tagging surfaced the correct top match in roughly 9 of 10 searches, and that ranking is what its AI photo search runs on. The scan runs unattended in the background, and what is already read is searchable while the rest is still going.
A catalog that decodes each file to pixels keywords phone HEICs and WebPs like JPEGs. Camera RAW is the format to check, covered in our guide to tagging HEIC, WebP, and RAW at scale.
Tip. If you want to see automatic keywords on your own photos, Tagrly's free tier reads the first 500 photos in any Drive or Dropbox folder, no credit card. Test it on a sample folder and read the output before deciding anything.
Put the focal subject first, or the keywords won't help
Automatic keywords fail by being generic, not by being missing. A library where every image is keyworded "person, event, indoor" is just as unsearchable as one with no keywords at all.
The fix is focal-subject tagging: the first keyword names the single dominant element of the photo ("sleeping golden retriever"), context keywords come after ("navy couch", "brass lamp"), and search ranks the focal keyword above the rest. That ordering is why a query for "golden retriever" returns photos of the dog before every living-room shot that happens to contain one in the background.
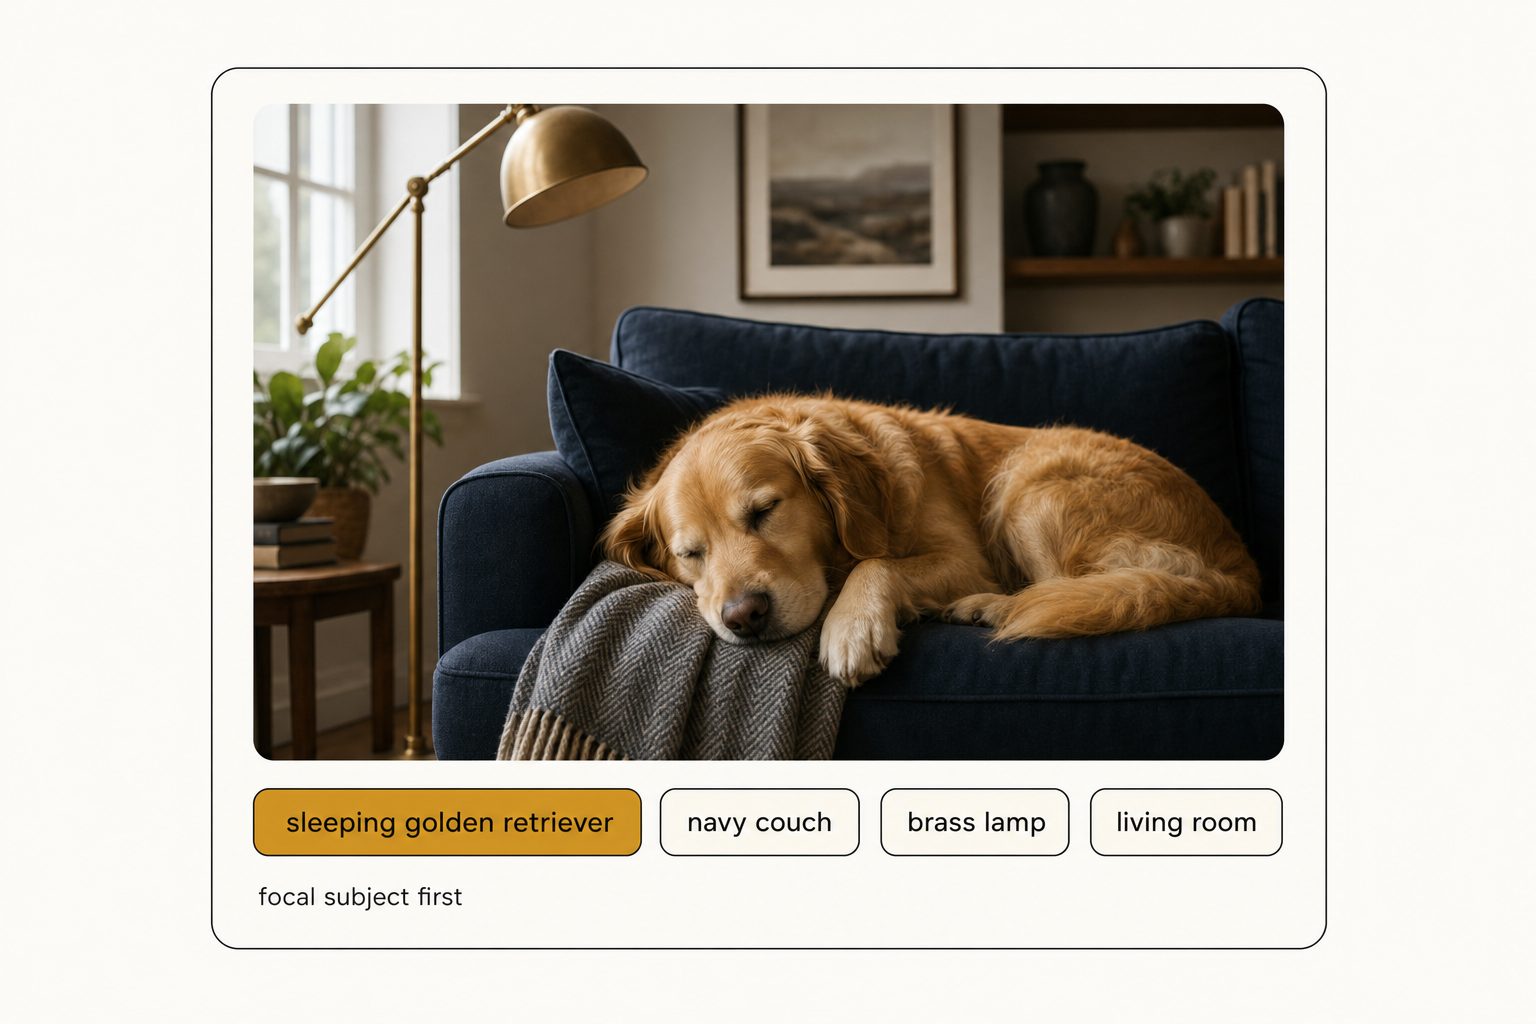
The five-photo test works on any tool in any tier. Run five of your own photos through it and look at the first keyword: if it names the focal subject, the tool understands your photos, and if it says "person" or "indoor", keep shopping.
To try a single photo without connecting anything, Tagrly's free image description and keyword generator takes one upload, no signup, and returns a written description and a keyword list, with five free reads a day.
Order matters for stock shooters too. Adobe Stock's contributor guidance allows up to 49 keywords per submission and says the first 10 positions carry the most weight in search, which is focal-first ordering in the agency's own words. Other agencies set their own caps, so check yours.
Which option should you pick?
Pick by where your photos live and who needs to find them, and for a team library in Drive or Dropbox that points to a connected catalog.
- Pick free or DIY if you have under 1,000 photos or a one-time job, and generic categories are good enough.
- Pick ON1 or Excire if you are solo, live in Lightroom, and need keywords embedded in the files, especially for stock submission.
- Pick an upload-and-export generator like PhotoTag.ai if you keyword batches for stock uploads and don't need a searchable library. Our photo metadata generators head-to-head covers that matchup, and Tagrly vs. PhotoTag.ai goes deeper.
- Pick a connected catalog like Tagrly if your photos live in Google Drive or Dropbox and more than one person needs to find them.
If you are staring at the pile and just want the route to pick, our hands-on guide to tagging thousands of photos walks the three routes by situation.
Whichever tier you land in, the sequence is the same: decide where the keywords need to live, run the five-photo test, then let the tool do the typing.
Automatic photo keywords are the base layer. You edit the 5 percent that need your private vocabulary, and the library finally searches like it should.
Frequently asked questions
What's the difference between automatic photo keywords and AI photo tagging?
They are the same job with different names. Photographers say keywording because the words traditionally end up in Lightroom's keyword panel or a stock agency's submission form, embedded in the file's IPTC metadata. Newer cloud tools say tagging because the words end up in a searchable index instead of inside the file. In both cases a vision model reads the image and writes descriptive words for it. The practical difference is the destination: keywording tools write into your files, tagging catalogs write into a database that points at your files. Decide which destination you need before choosing a tool, because very few tools do both well.
Can automatic keywords be written back into my image files?
It depends on the kind of tool. Desktop keyworders write into the IPTC and XMP fields inside the file: ON1 Photo Keyword AI embeds its keywords as XMP, and Excire's Lightroom plugin can write keywords back to your files. Those fields are what Lightroom, Bridge, and stock agency uploaders read. Connected catalogs work the other way. They never modify your originals and keep the keywords in a searchable index instead. Tagrly is one example: it writes nothing into your files, and with a workspace API key any photo's full reading can be pulled as JSON through its API, which suits a developer scripting a hand-off but does not make it an embedding tool. If embedded metadata is a hard requirement, use a desktop keyworder. If untouched originals and team search matter more, use a catalog, and keep a desktop keyworder for the files headed to an agency.
Are automatic photo keywords accurate enough for stock photography submissions?
As a base layer, yes. As a final submission, review them first. Modern vision models reliably identify subjects, settings, and visual style, which covers most of a stock keyword list. What they cannot know is your private vocabulary: client names, model names, campaign codes, or location details that are not visible in the frame. The workflow that works is automatic keywords first, then a human pass to add proper nouns and delete anything wrong. Also mind each agency's rules. Adobe Stock, for example, accepts up to 49 keywords per submission and weights the first 10 most heavily in search, so put the focal subject first.
How much does automatic photo keywording cost?
There are three price shapes. Free covers the search built into Google Photos and Google Drive, plus open-source desktop tools like digiKam, which is fine for small one-off jobs. Buy-once desktop apps like ON1 and Excire charge a one-time license (pricing varies by version, check their current pages). Connected catalogs charge a subscription or per-photo rate and typically include a free tier; Tagrly, for example, keywords the first 500 photos in any Drive or Dropbox folder free with no credit card. For a 10,000-photo library, any paid option costs a small fraction of the 50 to 80 hours of manual keywording it replaces.
Do automatic keywords work on RAW, HEIC, and WebP files?
Only if the tool decodes the file to pixels before the vision pass. Tagrly decodes JPEG, PNG, WebP, and HEIC the same way from Google Drive or Dropbox, so phone HEICs and web WebPs get the same keywords as JPEGs. Camera RAW is the format to check in any tool, Tagrly included, because RAW support varies by tool and by where the files are stored. Tools that depend on writing metadata back into the file can struggle with mixed formats too, since some formats have quirks around embedded metadata. If your library mixes phone HEICs, web WebPs, and camera RAW, put all three in a trial folder before committing.
Try Tagrly on your own photo library
Connect your Google Drive or Dropbox folder and Tagrly will tag every photo in bulk. Search by what is actually in the image, share specific shots with clients, and never lose a photo again.
- Free for your first 500 photos
- Read-only access, revoke anytime
- No credit card